Mask Images
Masks allow you to exclude specific areas of images from processing, such as windows, water, sky, shadows, vegetation, or image noise—from.. They are especially useful when scanning objects from multiple angles or orientations, helping to improve reconstruction accuracy and consistency by removing unwanted image data. Using masks can help filter out unwanted geometry during reconstruction, making the resulting model cleaner and reducing the need for extensive post-processing with the filtering tools.
Masks offer a non-destructive way to exclude parts of images from processing. They can be provided either as separate grayscale images (e.g., PNG files) or embedded in the alpha channel of the original images (e.g., TIFF files). In a mask, white areas will be used in processing, while black areas are excluded. Although grayscale values up to 256 shades (or partial transparency) can be used, they are not recommended, as they may interfere with processing and produce inconsistent results.
Generate Masks
Mask images can be generated using the AI Masking tool even before alignment, or after model creation using the Masking from Mesh tool. Both options are available in the Mask Images dropdown menu, located in the Process section of the ALIGNMENT tab.
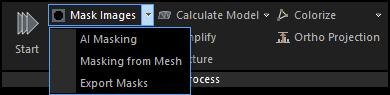
- AI Masking Automatically detects the background and isolates the object of interest in the image. This option is ideal for turntable captures or environments with minimal background features.
- Masking from Mesh Generates mask images based on the reconstructed mesh as seen from the cameras in the scene. Areas outside the mesh are unmasked and will be ignored in further processing.
Visualize Masks
To view a mask, open the desired image in the 2D view and go to the Image 2D/VIEW tab. In the Source section of the ribbon, set the Input Layer to . If the selected image does not have a mask layer, the option will be disabled.
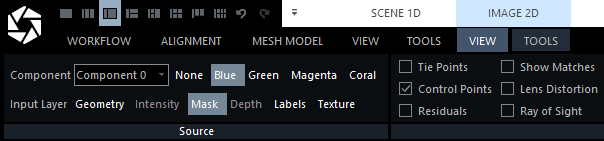
If the image displayed in the 2D view has multiple image layers assigned to it, you can switch between them using the TAB key on the keyboard.
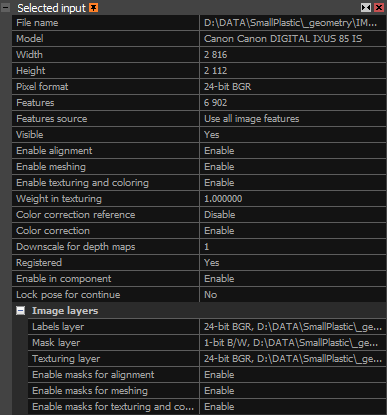
Use Mask Images
The Selected input panel appears when at least one input is selected. In the Image layers section, you can view all layers assigned to the selected image, including options for the mask layer if one is present. For the mask layer, you can set its availability during the alignment, meshing, or texturing process by changing the corresponding setting.